I was working with a client recently, who was particularly upset about what she was failing to accomplish and as a result, felt a lot of self-criticism and fear. While I was listening, it occurred to me that our negative beliefs about ourselves work very much like the “editor” in our brain that criticizes our work while we try to draw, paint or write.
Learning to turn off that editor in order to fully access the intuitive, creative mind is an important skill to practice, one that expands possibilities and allows creativity to develop. Likewise, learning to change our other limiting and damaging self-critical beliefs is equally as importance to our over-all health and happiness.
And so I said, to my client, “Do you ever draw?” The answer came, “Heavens, no! I can’t draw a stick.” And that’s what she believed. “Okay, then let’s see if you are right about that.” And I suggested that she find a photograph of herself or a friend and turn it upside down, then draw the lines she saw there to see what happened. The next time she returned, she brought her drawings and expressed surprise at how much better her upside-down drawing appeared than her right-side-up attempt.
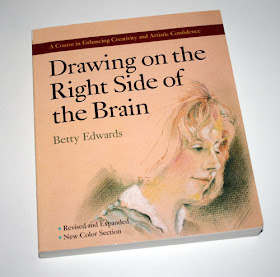
This wonderful exercise comes from
Drawing on the Right side of the Brain, by Betty Edwards, an insightful book that can jump start your drawing skills and disprove the myths you believe about your ability to draw.

What happened to me and happens to everyone who tries this is, “the left brain goes to sleep”. The left brain, even though this designation is over simplified, holds our rules, our order, symbols, our beliefs and, of course, our self-criticism. When you turn the picture upside down, the left brain says, “Oh, that is foolish,” and as a result, ‘beliefs’ about what the drawing should look like disappear. In the absence of expectations, self-criticism stops. And the next thing you know, you are just seeing the lines and following them around the page with your pencil.
Now wouldn’t it be nice if we could do this with all our self-critical thoughts?
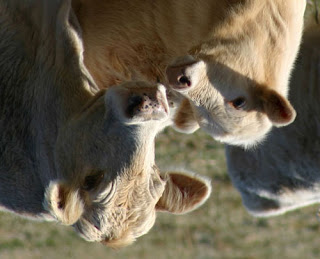
 Today's upside down drawing. I haven't done this in a while. I'm still surprised by the results.

I'll have to try that baby face again. Fun.
 My favorite coffee mug earned its place of honor quite easily. It feels good in my hand and evokes pleasant memories. Friends urged me, “You have to go to Beeman’s for breakfast before you leave. They have the best pastries in the world.” So on my last day in Port Aransas, TX, I had two parting missions, a trip to Beeman’s and one last visit to the beach. Beeman’s was wonderful as promised, friendly, steamy and full of delicious temptations. I departed with black coffee, a sweet fat cinnamon roll, my mug, and happily headed to the beach. As I parked my vehicle and lowered the window, I wondered how long it would take the gulls to notice I had food. Silly me. No sooner had the thought escaped than a Laughing gull positioned himself on a post right beside me. What a comedian! --Nature and laughter forever vivid in a mug.


 In a perfect world, the chattering house wren that invited me to look out the window would be under that suet basket in the photo. Oh, well.


 6. When you run out of thread, make a loop knot by inserting the needle back under the stitch and pulling the knot snuggly to the back side of the coil. Then insert the needle back through the coil toward the front, being careful to go between the needles rather than piercing a needle. Cut the end thread close to the pine needle coil and if visible tuck in with the tip of the sewing needle. Begin the next stitch by tying the thread to the next stitch in the coil beneath and pull the knot through to the inside between the two coils to the right of the stitch. Take the second stitch by coming over the coil, crossing over the added pine needle and inserting the needle over (to the left) of the stitch of the coil beneath it.
 7. When your coil reaches its starting point, you will have two rows of pine needles placed completely around the rim. Continue to stitch as previously without adding pine needles, rolling the coil toward the inside. As you continue this process, the number of needles will thin and you will continue to make stitches securing the ending coil toward the inside until you run out of needles. Tie off the thread pulling the knot to the inside and securing the end by pulling your thread to the front side of the coil, coming between pine needles. Snip off this end thread close to the coil and tuck any thread that is visible. Tuck or snip any pine needles that look untidy.

 I feel very fortunate that I have only to look out my window or stop to listen for a moment to discover one of these lively sprites. Besides their incessant chant, tche de de de, tche de de de, their acrobatics never fail to delight. As much trapeze artist as persistent vocalist, these energetic gems are cheerful neighbors in the waning days of winter.


 Whooping cranes and coastal marshes are fun to daydream about on a cold winter day.

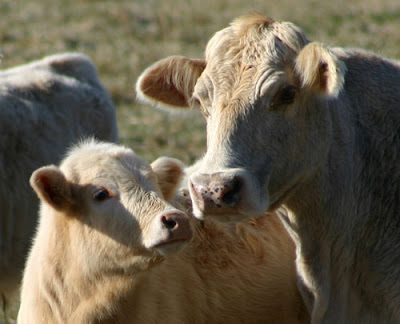
 The sketch above started upside down and got worked over right side up--several times. There was something about the shapes and the angle of the calf's head that I couldn't quite get so I continued to change it until I was ready to try another one.
  So I added a little watercolor and ink.
  Now that I look at the image, I see that I focused on the Mom's face more with the watercolor and barely dabbled on the baby's face. A little bit of gratitude to Mom for being easier to draw? I think so. Actually, I think Mom's face is more interesting.

 Today's upside down drawing. I haven't done this in a while. I'm still surprised by the results.
 I'll have to try that baby face again. Fun.